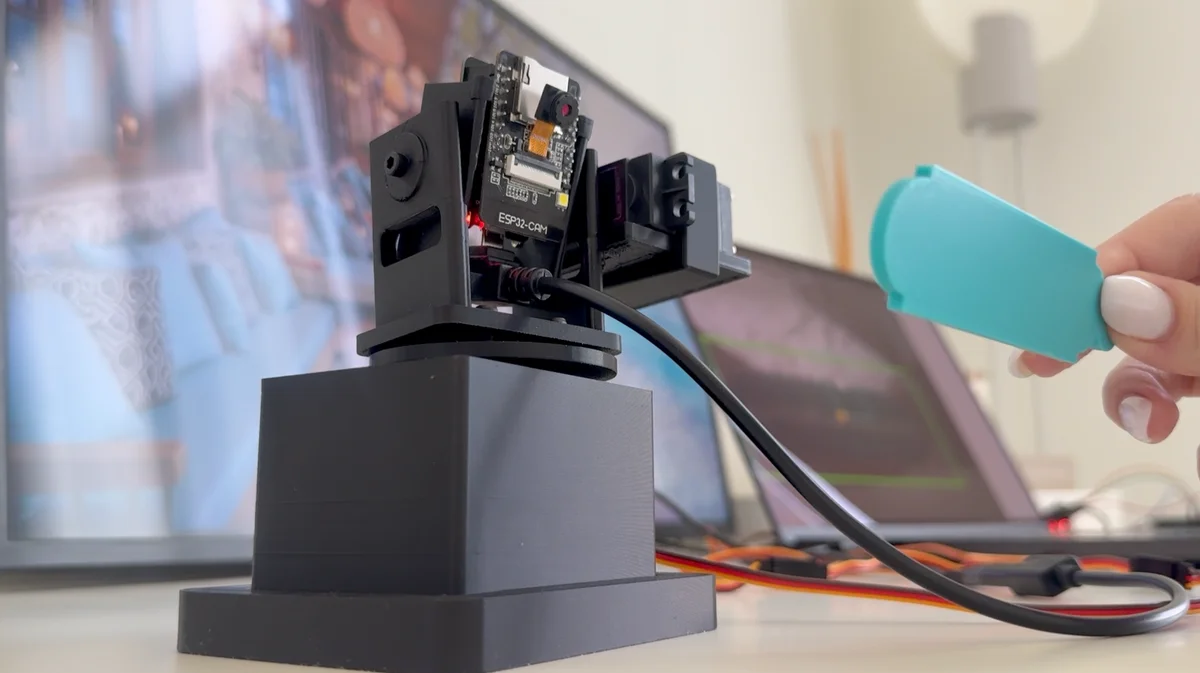
ESP32-CAM AI Object Tracking Camera
 O
OAbout this program
ESP32-CAM AI Object Tracking Camera
A DIY pan/tilt camera that finds a custom target object with a trained YOLO model and physically turns to follow it. An ESP32-CAM streams live video over Wi-Fi to a laptop; Python runs the YOLO detector and sends movement deltas over serial to a second ESP32-WROOM-32 board, which drives two servos through a PCA9685 driver. All mechanical parts are 3D printed from an OpenSCAD source, so the mount can be resized for different servos and camera boards.
This is orobot's first entry combining on-device Wi-Fi video streaming with a trained computer-vision model driving physical actuators — most of the catalog's vision work is closed-loop on a single board; this one splits video capture (ESP32-CAM), inference (laptop/YOLO), and actuation (second ESP32 + PCA9685) across three hops.
How It Works
ESP32-CAM --Wi-Fi video stream--> Laptop (Python + YOLO)
                                        |
                                serial movement command
                                        v
                                  Second ESP32
                                        |
                                       I2C
                                        v
                               PCA9685 servo driver
                                        |
                                        v
                             Pan and tilt servos move
What You'll Need
- ESP32-CAM module (the video source)
- ESP32-WROOM-32 DevKit board (the servo controller)
- PCA9685 16-channel PWM/servo driver
- 2x MG995/MG996-style servos (pan + tilt)
- External 5V power supply for the servos
- Jumper wires, M3 screws, micro screws for the ESP32-CAM module
- 3D-printed mount parts (STLs included; OpenSCAD source included for resizing)
- A laptop to run the Python + YOLO tracking script
Build Notes
- The servos are powered externally at 5V — the ESP32 shouldn't power them directly, they draw more current than its regulator is rated for.
- I2C wiring: ESP32 GPIO21 -> PCA9685 SDA, GPIO22 -> PCA9685 SCL. All grounds must be tied together (ESP32, PCA9685, and the external 5V supply).
- The trained YOLO model (
models/best.pt) was trained on a custom 3D-printed target object — swap in your own dataset viapython/capture_images.pyandpython/prepare_dataset.pyto track something else. - For real-time tracking, a smaller/faster video stream tracked better than a high-resolution one with too much latency — the source project runs the ESP32-CAM at a reduced frame size for this reason.
- This is an actively-evolving prototype per the source author — movement smoothing, wiring, and the printed parts are still being refined upstream.
orobot Learning Interface
The orobot program here exposes the pan and tilt axes as motor slots you can jog directly from the browser (joystick, center button, scan sweep) to learn the control surface. The full AI tracking loop (YOLO inference + serial bridge) still runs on your own machine per the source repo's Python setup — this program is a hardware-control on-ramp, not a port of the vision pipeline.
Attribution
- Creator: mmm1712
- Source: github.com/mmm1712/ESP32-CAM-AI-Object-Tracking
- Commit: e7a6c06c9986dae844f30cb7bdddff821d888e5d
- License: Shared by the author for learning and experimentation (no formal OSS license file in the source repo — confirm terms with the author before commercial use)
🖨 Print Files (6)
base_plate.stl
camera_cradle.stl
horn.stl
pan_servo_cage.stl
servo_holder.stl
tilt_yoke_base.stl
Required Hardware
| Item | Qty | Est. Unit Cost | Notes |
|---|---|---|---|
| ESP32-CAM module | 1 | $9 | Video source, streams over Wi-Fi |
| ESP32-WROOM-32 DevKit | 1 | $8 | Runs the servo controller sketch |
| PCA9685 16-channel PWM/servo driver | 1 | $7 | I2C servo driver, address 0x40 |
| MG995/MG996-style servo | 2 | $6 | Pan + tilt axes |
| External 5V power supply | 1 | $8 | Powers servos separately from the ESP32 |
| Jumper wires (assorted) | 1 pack | $4 | I2C + power wiring |
| M3 screws | 1 pack | $3 | Mount assembly |
| Micro screws for ESP32-CAM module | 1 pack | $2 | Secures the camera board to the cradle |
| 3D-printed mount parts | 6 parts | — | STL files included; PLA/PETG, ~1 spool |
Prices are rough commodity estimates (not sourced from the original README, which lists parts without pricing) — shop around, these are widely available on Amazon/AliExpress/electronics marketplaces.